Follow Me On Social Media!
Crispy Baked Chicken Wings: The “pH-Alkaline” Method
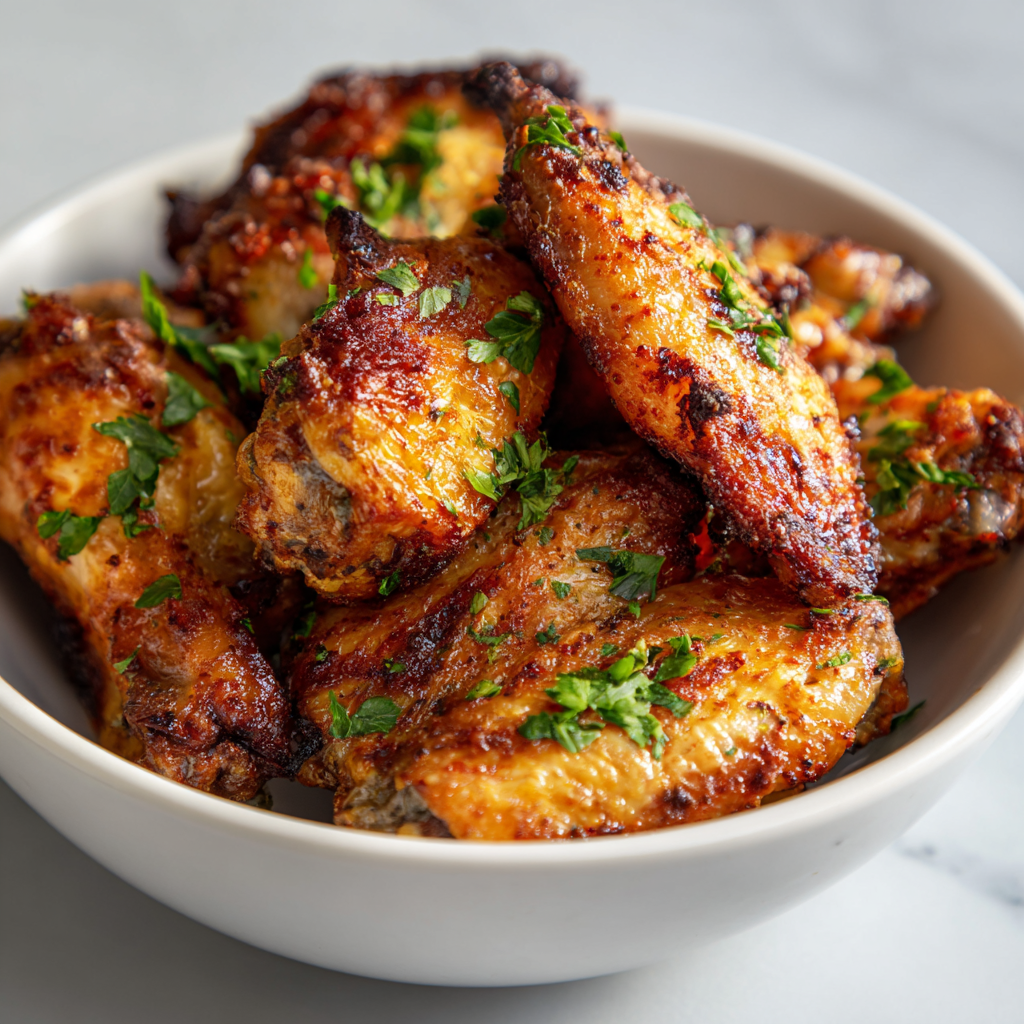
The holy grail of chicken wings is achieving a “deep-fried” crunch without the vat of oil. In 2026, we achieve this through Alkaline Skin Breakdown.
The Science of the “Crunch”
The secret ingredient isn’t a special flour; it’s Baking Powder (specifically, aluminum-free).
- Skin Thinning: Baking powder is alkaline, which raises the pH level of the chicken skin. This breaks down the peptide bonds in the skin proteins, allowing it to crisp up faster and become thinner.
- Carbon Dioxide Micro-Bubbles: When the baking powder reacts with the natural moisture of the chicken and the heat of the oven, it creates tiny CO2 bubbles. This increases the surface area of the skin, resulting in a “blistered” texture that mimics the crunch of a fried wing.
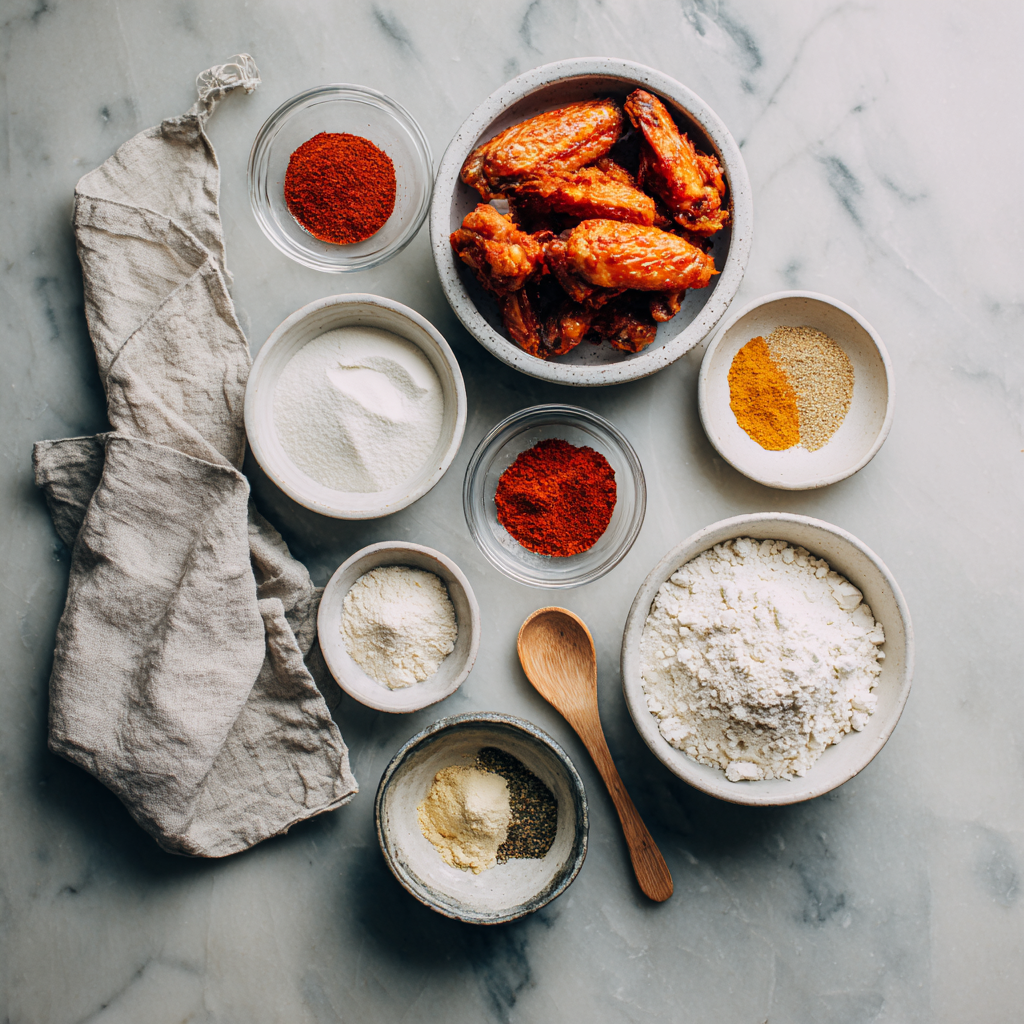
Ingredients List
- The Wings:
- 2 lbs Chicken Wings: Party style (flats and drumettes).
- The “Dry-Brine” Coating:
- Baking Powder (1 tbsp): Must be Baking Powder, not Baking Soda.
- Kosher Salt (1 tsp).
- Garlic Powder & Smoked Paprika (1 tsp each).
- The “2026 Signature” Sauce (Optional):
- Frank’s RedHot (1/3 cup) + Melted Butter (3 tbsp) + Honey (1 tbsp).
Timing: The “Dehydration” Arc
- Prep/Drying: 15 minutes (plus optional chill).
- Baking: 45–50 minutes.
Step-by-Step Instructions
Step 1: The “Absolute Dry” Rule
The biggest enemy of crispiness is moisture. Pat the wings with paper towels until they are bone-dry.
Actionable Advice: If you have time, place the wings on a wire rack in the fridge for 2–4 hours (uncovered). This “air-dries” the skin, which is the pro-secret to a glass-like crunch.
Step 2: The Dusting
In a large bowl, toss the dry wings with the baking powder, salt, and spices. Ensure every wing is lightly and evenly coated. It should look like a thin, dusty film, not a thick batter.
Step 3: The Elevated Bake
Place a wire cooling rack on top of a foil-lined baking sheet. Arrange the wings on the rack in a single layer.
- The Science: Elevating the wings allows hot air to circulate 360° around the meat. If they sit directly on the pan, the bottom will steam in its own fat and turn soggy.
Step 4: The Two-Stage Heat
- Stage 1: Bake at 250°F (120°C) for 20 minutes. This renders out the fat slowly so it doesn’t “trap” moisture.
- Stage 2: Crank the oven to 425°F (220°C) for 25–30 minutes. This is when the Maillard reaction kicks in and the skin blisters.
Step 5: The “No-Steam” Toss
Once golden and crispy, remove from the oven. If you are saucing them, toss them in a bowl with your sauce immediately and serve right away.
- The 2026 Pro-Tip: Never let sauced wings sit; the steam from the sauce will soften that hard-earned crunch within minutes.
Common Mistakes to Avoid
- Baking Soda vs. Powder: Never use Baking Soda. It will make the wings taste metallic and bitter. Baking Powder contains the necessary acid/base balance for the reaction.
- Crowding: If the wings touch, they create steam “pockets.” Leave at least 1 inch of space between each wing.
- Using “Wet” Marinades: If you want crispy skin, do not marinate in liquid. Save the liquid flavors for the post-bake sauce.
3 Modern Dips for 2026
| Dip Name | Key Ingredients | Why it Works |
| Miso Blue Cheese | Blue cheese + White Miso | The miso adds a “funky” umami depth to the creaminess. |
| Hot Honey Ranch | Ranch + Sriracha + Honey | A perfect balance of cool, sweet, and heat. |
| Gochujang Mayo | Mayo + Gochujang + Lime | A fermented, spicy-tart kick for a global twist. |
Export to Sheets
Would you like me to help you design a “Dry Rub” flavor profile (like Lemon Pepper or Garlic Parm) so you don’t even need a sauce?