Follow Me On Social Media!
Cozy Christmas Simmer Pot: The Science of “Scentsory” Comfort
Why Does a Simmer Pot Smell Better Than a Candle?
Did you know that simmer pots, also known as stovetop potpourri, utilize hygroscopic evaporation to scent your home? Unlike synthetic candles that release phthalates and artificial fragrances, a simmer pot uses water vapor to carry essential oils directly from whole spices and fruits. This not only adds a gentle layer of humidity to dry winter air but also engages the olfactory bulb, which is directly linked to the limbic system (the brain’s emotional center). A Christmas simmer pot isn’t just a smell; it’s a biological “trigger” for relaxation and nostalgia.
Ingredients List
- The Citrus Base:
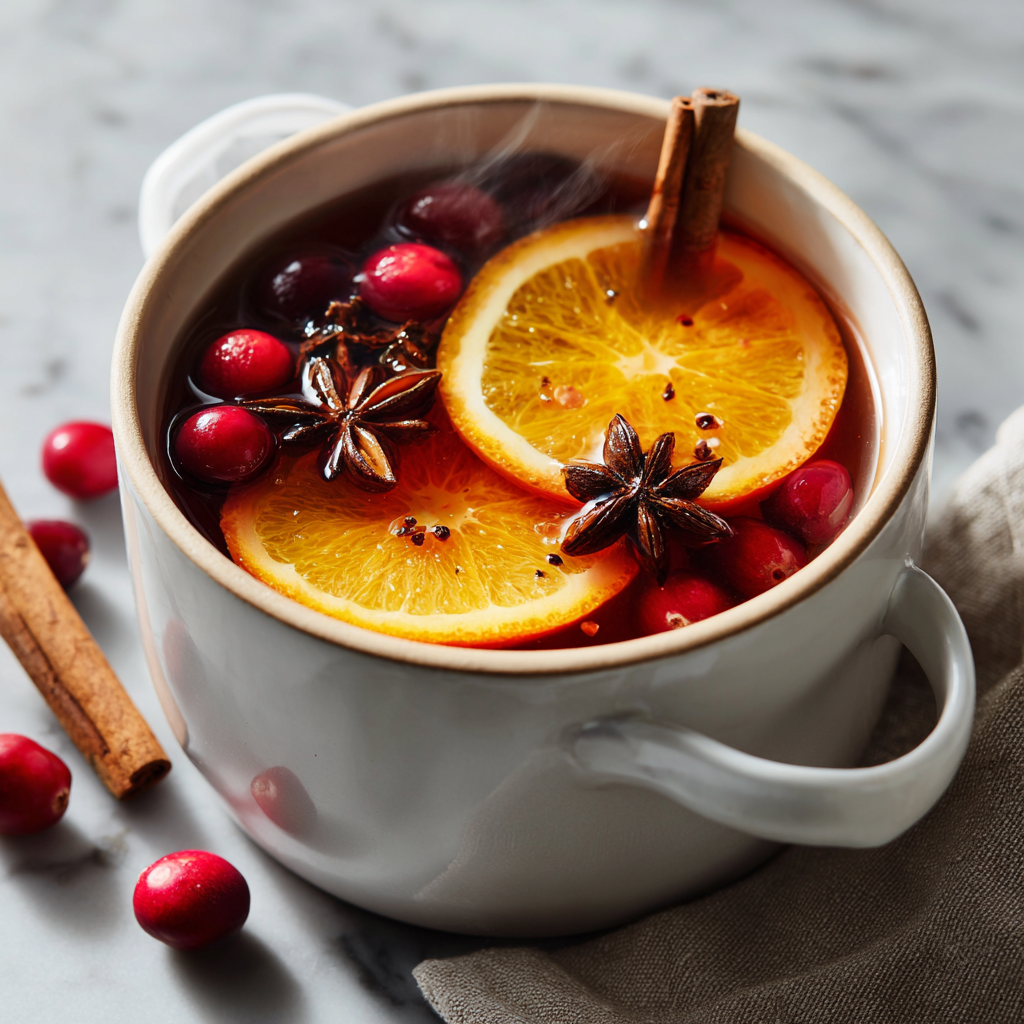
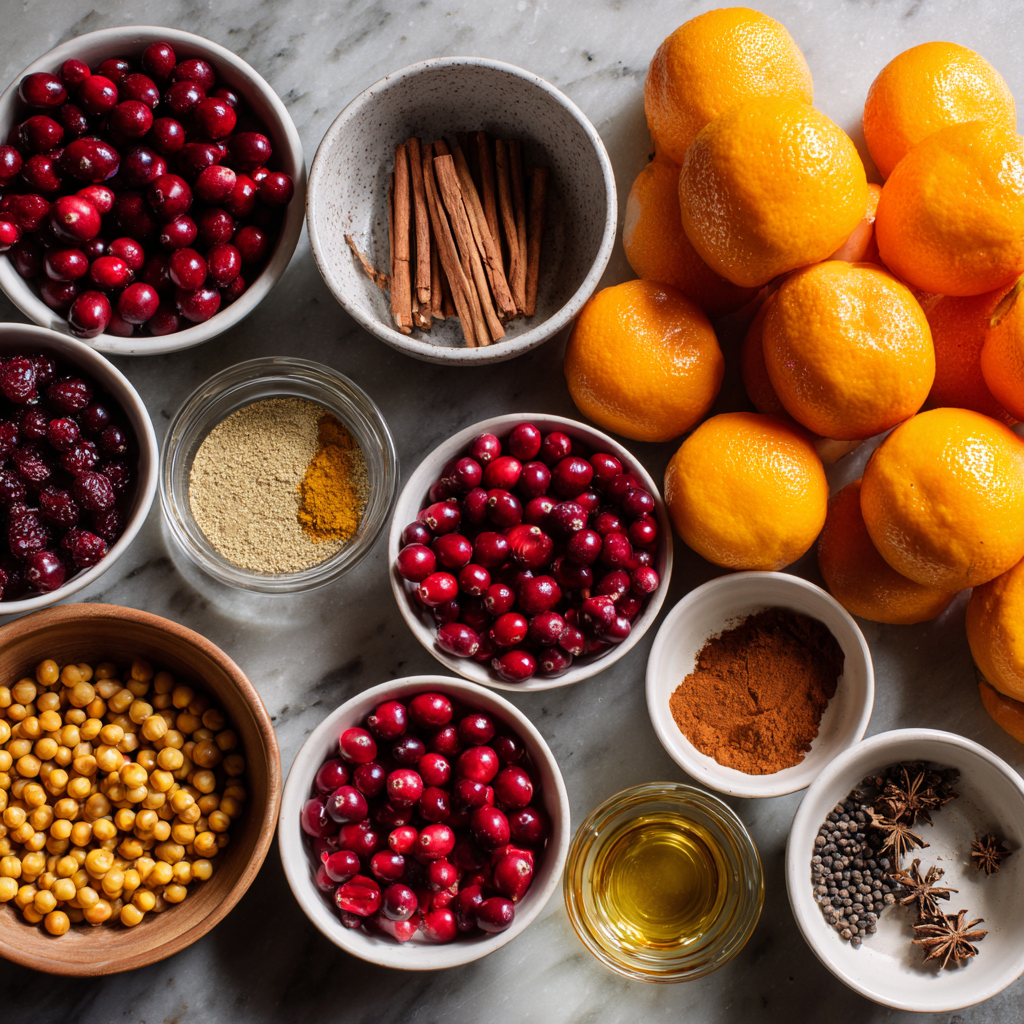
- Orange (1): Sliced into rounds. Oranges provide the bright, uplifting top notes.
- Cranberries (1/2 cup): Fresh or frozen. They add a tart, crisp scent and beautiful festive color.
- The Warm Spices:
- Cinnamon Sticks (3–4): The “anchor” of the Christmas scent.
- Whole Cloves (1 tbsp): Provides a deep, spicy undertone.
- Star Anise (2–3): Adds a subtle, licorice-like complexity.
- The Forest Elements:
- Fresh Pine or Rosemary Sprigs (2–3): Adds the “Christmas tree” resinous aroma.
- Fresh Ginger (1-inch knob): Sliced; adds a zesty, warming kick.
- The Liquid:
- Water (4–6 cups): Or enough to fill your pot 3/4 full.
- Vanilla Extract (1 tsp): For a “sugar cookie” finish.
Timing: Low and Slow Diffusion
Total time investment: As long as you’re home!
- Prep: 5 minutes.
- Active Scenting: 2–6 hours (requires monitoring).
Step-by-Step Instructions
Step 1: The Preparation
Slice the orange and ginger. You can leave the peels on—the peels actually contain the highest concentration of limonene, the essential oil responsible for the citrus scent.
Step 2: The Assembly
Place all fruits, spices, and herbs into a medium-sized pot (or a slow cooker).
Step 3: The Hydration
Add water until the ingredients are submerged. Add the vanilla extract last.
Actionable Advice: Do not overfill the pot to the brim. Leave at least 2 inches of space at the top to prevent bubbling over once it reaches a simmer.
Step 4: The Simmer
Place the pot on the stove over medium-high heat until it just reaches a boil. Immediately turn the heat down to the lowest possible setting (simmer).
- Expert Insight: You want the water to “shimmer” with occasional small bubbles. A hard boil will cook the fruit too quickly and may cause a bitter, “burnt” smell.
Step 5: The Maintenance
Set a timer for every 45–60 minutes to check the water level.
- Pro Tip: As the water evaporates, the scent intensifies, but the ingredients can burn if the pot goes dry. Simply add warm water from the tap to keep it going all day.
Benefits of a Simmer Pot
- All-Natural: Zero chemicals, paraffin, or lead wicks.
- Budget-Friendly: Great way to use up “ugly” fruit or leftover herb stems.
- Humidity: Acts as a natural humidifier for homes with dry heating systems.
Common Mistakes to Avoid
- Leaving it Unattended: Never leave a simmer pot on the stove if you leave the house or go to sleep.
- Using Ground Spices: Ground cinnamon or cloves will turn the water into a muddy, brown sludge that doesn’t smell as clean as whole spices. Stick to whole sticks and buds.
- High Heat: High heat destroys the delicate aromatic compounds in the pine and citrus. Low heat is the only way to go.
Gift Idea: The Simmer Pot Jar
You can package the dry ingredients (orange slices, cinnamon sticks, cloves, and star anise) in a mason jar. Include a small tag with instructions for the recipient to add water and a sprig of pine. It’s the perfect, “zero-waste” holiday gift.
Would you like me to help you create a “Springtime Simmer Pot” recipe using lemon, mint, and lavender for a fresh, clean scent?