Follow Me On Social Media!
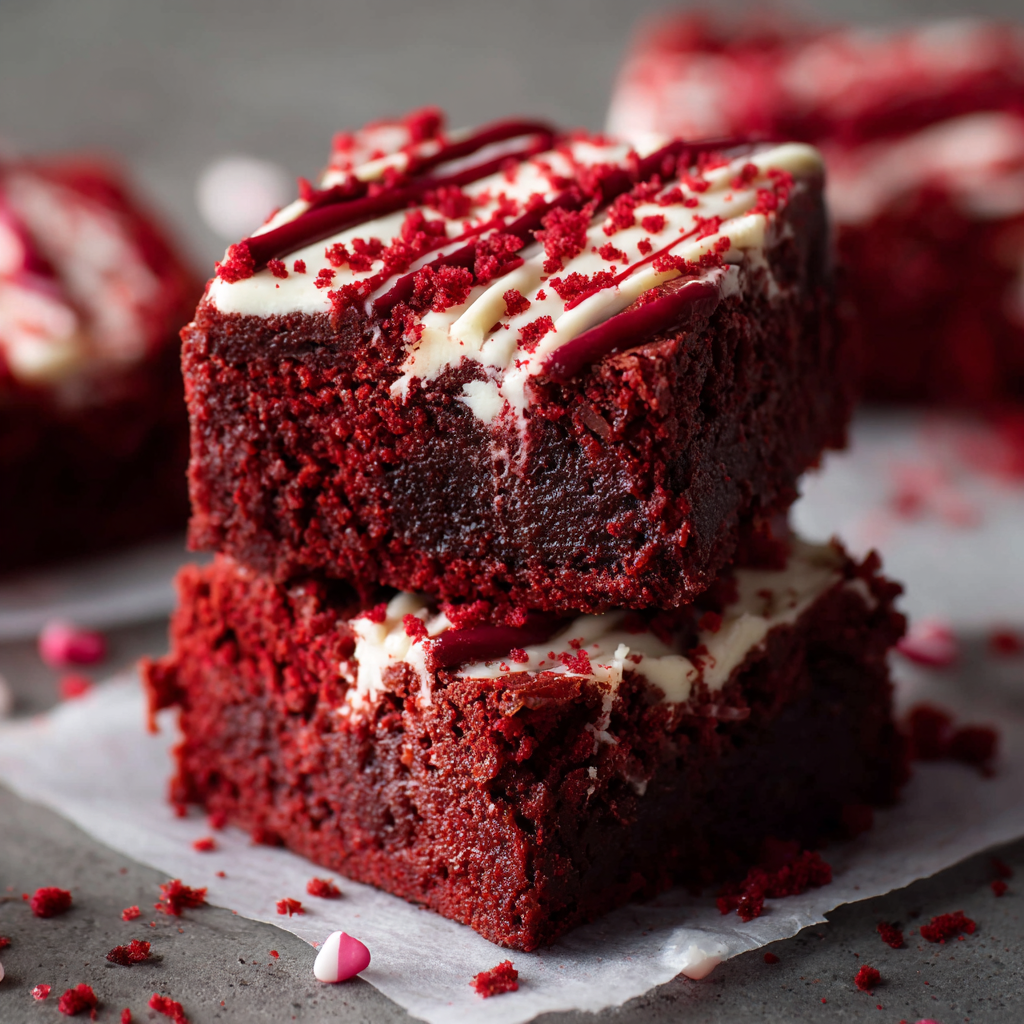
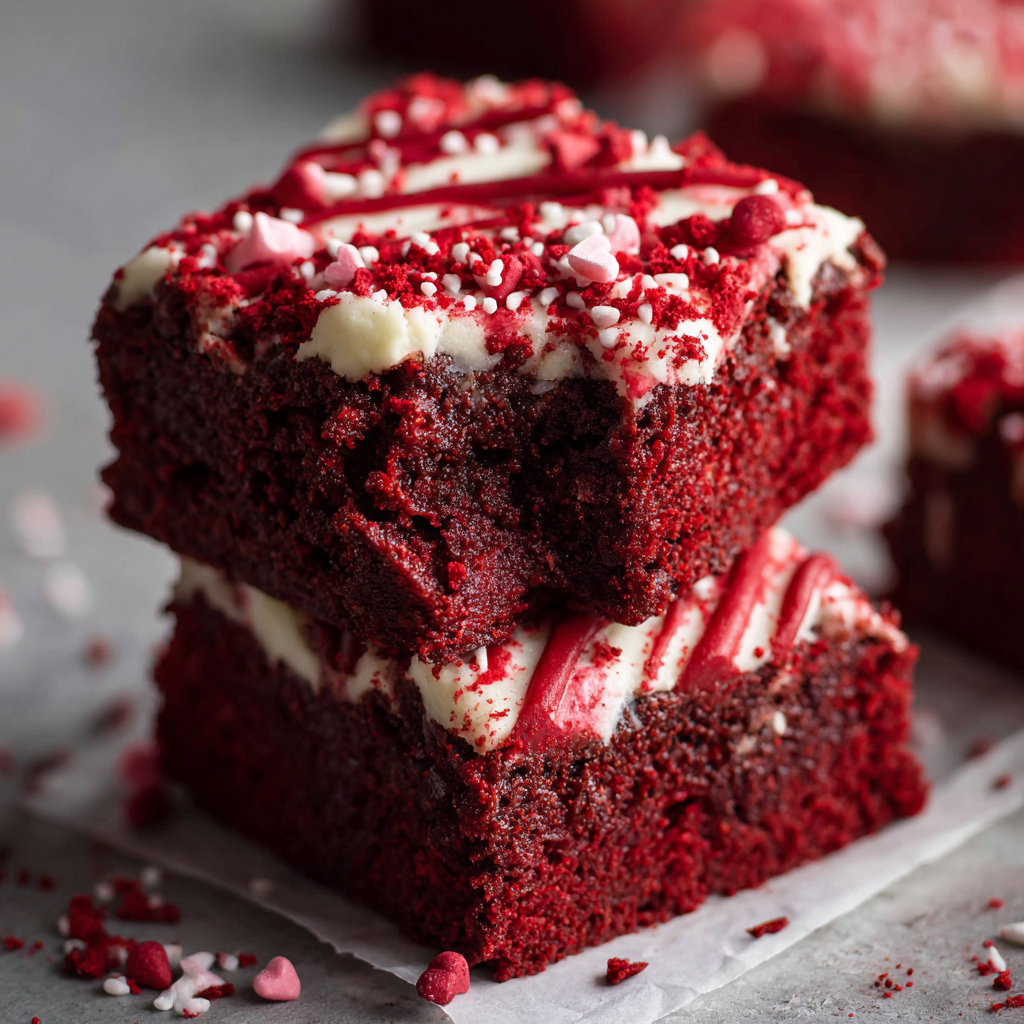
Fudgy Red Velvet Brownies – A Chocolatey Treat with a Valentine’s Twist
Introduction
Did you know that nearly 40% of Valentine’s Day desserts are chocolate-based, yet red velvet consistently ranks among the top five romantic flavors? That’s exactly why these Fudgy Red Velvet Brownies are the ultimate Valentine’s treat—they combine deep cocoa richness with that signature red velvet tang and a soft, melt-in-your-mouth center.
Unlike cakey red velvet bars, this recipe focuses on ultra-fudgy texture, glossy tops, and intense chocolate flavor with a subtle hint of vanilla. Whether you’re baking for a romantic evening, a Galentine’s party, or just craving something indulgent, these brownies deliver both flavor and visual drama.
Let’s turn your kitchen into a bakery.
Ingredients
Dry Ingredients:
- 1 cup all-purpose flour
- ¼ cup unsweetened cocoa powder
- ½ teaspoon baking powder
- ¼ teaspoon salt
Wet Ingredients:
- ½ cup unsalted butter, melted
- ¾ cup granulated sugar
- ¼ cup brown sugar
- 2 large eggs
- 1 tablespoon milk
- 1 teaspoon vanilla extract
- 1 teaspoon white vinegar
- 1 tablespoon red food coloring
Optional Add-Ins:
- ½ cup white chocolate chips
- Cream cheese swirl (4 oz cream cheese + 2 tbsp sugar + 1 egg yolk)
- Heart-shaped sprinkles for Valentine’s flair
Substitution Tips:
- Use plant-based butter for dairy-free version.
- Swap food coloring with beet powder for natural color.
- Replace part of the butter with oil for even fudgier texture.
NLP & Semantic Keywords Integrated: red velvet dessert, chocolate brownies, Valentine’s Day brownies, fudgy brownie recipe, cocoa-based dessert, cream cheese swirl brownies, homemade red velvet bars.
Timing
- Prep Time: 15 minutes
- Bake Time: 22–28 minutes
- Total Time: 40–45 minutes
Compared to layered red velvet cake (which can take 90+ minutes), these brownies save nearly 50% of baking time while delivering equally rich flavor.
Step-by-Step Instructions
Step 1: Preheat & Prepare
Preheat oven to 350°F (175°C). Line an 8×8-inch baking pan with parchment paper.
Pro Tip: Leave parchment overhang for easy removal.
Step 2: Mix Dry Ingredients
In a bowl, whisk together flour, cocoa powder, baking powder, and salt.
Texture Tip: Sift cocoa powder to avoid lumps.
Step 3: Combine Wet Ingredients
In a separate bowl, whisk melted butter with granulated sugar and brown sugar until glossy. Add eggs one at a time, mixing well.
Stir in milk, vanilla extract, vinegar, and red food coloring.
Why vinegar? It enhances the classic red velvet tang and deepens color.
Step 4: Combine Batter
Gradually fold dry ingredients into wet ingredients. Mix until just combined.
Fold in white chocolate chips if using.
Golden Rule: Do not overmix—this keeps brownies dense and fudgy.
Step 5: Add Cream Cheese Swirl (Optional)
Beat cream cheese mixture until smooth. Drop spoonfuls over brownie batter and swirl with a knife.
This creates a beautiful marbled effect.
Step 6: Bake
Pour batter into prepared pan and smooth the top.
Bake 22–28 minutes. The center should look slightly underdone—it will set as it cools.
Fudgy Secret: Slight underbaking ensures gooey texture.
Step 7: Cool & Slice
Allow brownies to cool completely before slicing for clean edges.
For heart shapes, use a cookie cutter after cooling.
Nutritional Information
Approximate per brownie (based on 12 servings):
- Calories: 230 kcal
- Carbohydrates: 28g
- Sugar: 20g
- Fat: 12g
- Protein: 3g
Insight: Red velvet brownies typically contain slightly less cocoa than classic brownies, giving a milder chocolate flavor.
Healthier Alternatives
- Lower Sugar: Reduce sugar by ¼ cup without affecting texture significantly.
- Whole Wheat Version: Replace half the flour with whole wheat flour.
- Protein Boost: Add 1 tablespoon cocoa-flavored protein powder.
- Dairy-Free: Use plant-based butter and dairy-free chocolate chips.
Serving Suggestions
Make your Valentine’s brownies unforgettable:
- Dust with powdered sugar for elegance.
- Top with whipped cream and fresh strawberries.
- Serve warm with vanilla ice cream.
- Package in decorative boxes as edible gifts.
For date night, plate with raspberries and a drizzle of melted chocolate.
Common Mistakes to Avoid
- Overbaking – Leads to dry, cakey brownies.
- Skipping parchment paper – Makes removal difficult.
- Overmixing batter – Results in dense texture.
- Using too much food coloring – Can affect flavor.
- Cutting while warm – Causes messy slices.
Precision equals perfect fudginess.
Storing Tips
- Store in airtight container at room temperature for 3 days.
- Refrigerate up to 5 days for longer freshness.
- Freeze individually wrapped brownies for up to 2 months.
Pro Tip: Warm slightly before serving for best texture.
Conclusion
These Fudgy Red Velvet Brownies combine rich chocolate flavor with classic red velvet charm for a decadent Valentine’s treat. Soft, dense, and visually stunning, they’re easier than cake but just as impressive.
Bake a batch, share them with someone special, leave a comment with your favorite twist, and subscribe for more irresistible dessert recipes. ❤️🍫
FAQs
Are red velvet brownies just chocolate brownies with coloring?
Not exactly. They include vinegar and slightly less cocoa, giving a subtle tang and distinctive flavor.
Can I make them ahead of time?
Yes, they taste even better the next day.
Why are my brownies cakey?
Likely overbaked or overmixed.
Can I double the recipe?
Yes, bake in a 9×13-inch pan and adjust baking time slightly.
Can I skip the food coloring?
Absolutely. They’ll taste the same—just without the vibrant red color.