Follow Me On Social Media!
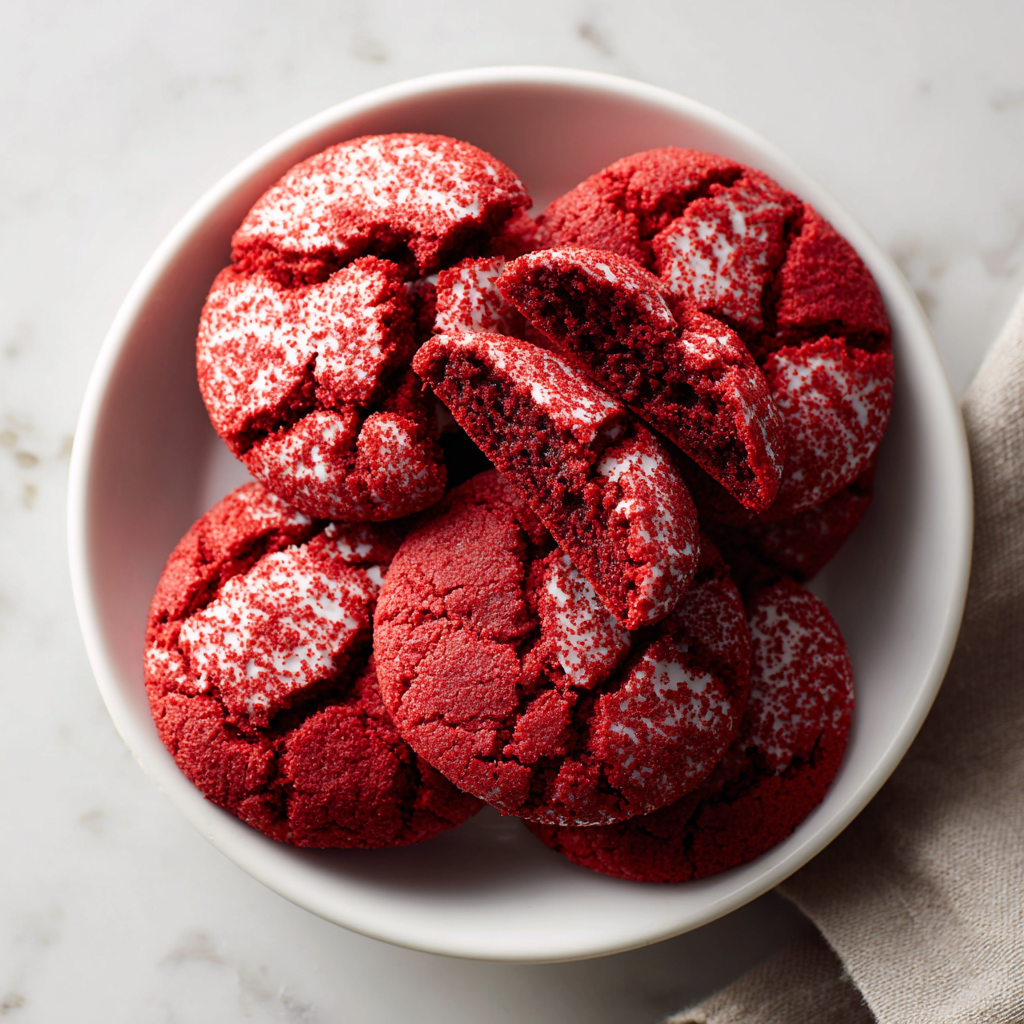
Red Velvet Cookies: The Science of “Velvet” Texture
Why is it Called “Velvet” and Not Just Chocolate?
Did you know that the “Velvet” in Red Velvet originally referred to the chemical reaction between acidic cocoa powder and vinegar? This reaction breaks down the gluten in the flour, resulting in a soft, fine-grained texture that feels like velvet on the tongue. In cookie form, we replicate this by using a high ratio of brown sugar and a touch of cornstarch. These cookies aren’t just red-colored chocolate cookies; they are a distinct balance of mild cocoa and a specific “tang” that only comes from the interaction of dairy and acid.
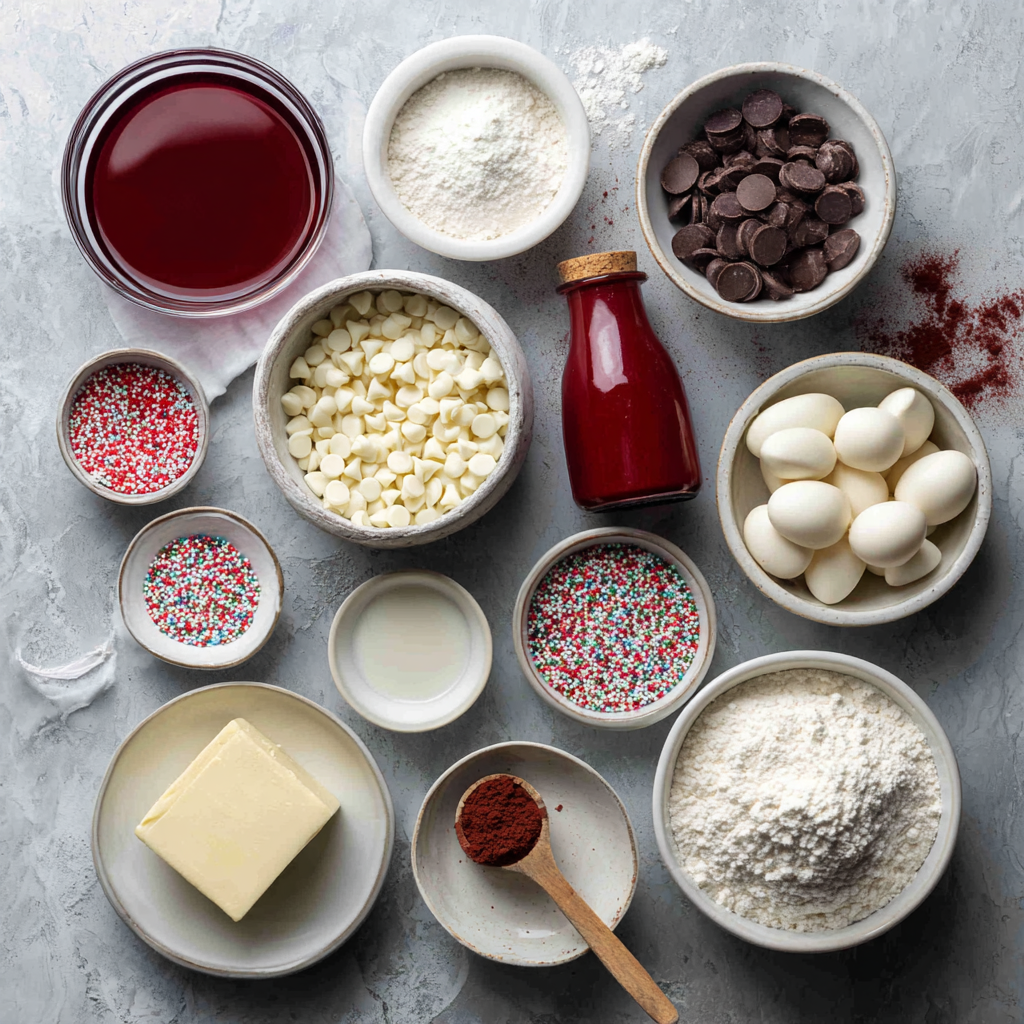
Ingredients List
- The Dry Base:
- All-Purpose Flour (2 cups): Sifted with Cornstarch (1 tbsp) for that signature soft crumb.
- Unsweetened Cocoa Powder (3 tbsp): Use traditional cocoa for the best color reaction.
- Baking Soda (1 tsp) & Salt (1/2 tsp).
- The “Velvet” Builders:
- Unsalted Butter (3/4 cup): Softened.
- Light Brown Sugar (1 cup): Packed; provides essential moisture.
- Granulated Sugar (1/2 cup).
- Large Egg (1) + Vanilla Extract (2 tsp).
- Lemon Juice or White Vinegar (1 tsp): To activate the “velvet” chemistry.
- The Aesthetics:
- Red Food Coloring (1 tbsp): Gel coloring provides the most vibrant hue.
- White Chocolate Chips (1 1/4 cups): The essential creamy contrast.
Timing: The Importance of the “Cold Cure”
Total time investment: 1 hour and 15 minutes.
- Prep & Mixing: 15 minutes.
- Chilling (Essential): 45 minutes.
- Bake Time: 10–12 minutes.
Step-by-Step Instructions
Step 1: The Creaming Foundation
Cream the softened butter and both sugars in a mixer for 3–4 minutes.
Actionable Advice: You want the mixture to look like pale frosting. This incorporates air, which helps the cookies stay soft rather than becoming dense like a brownie.
Step 2: The Color and Acid
Add the egg, vanilla, lemon juice (or vinegar), and red food coloring.
- Expert Insight: Adding the food coloring to the wet ingredients before the flour ensures the color is perfectly even throughout the dough without over-working the flour.
Step 3: The Gentle Fold
Slowly mix in the dry ingredients. Once no dry streaks remain, fold in the white chocolate chips by hand.
Pro Tip: Do not over-mix! Over-mixing develops gluten, which will turn your “velvet” cookies into “tough” cookies.
Step 4: The Cold Cure
Scoop the dough into rounded tablespoons and place on a plate. Chill in the refrigerator for at least 45 minutes.
- Why? Chilling solidifies the butter. If you bake them warm, the red dough will spread too thin and lose its shape.
Step 5: The Soft Bake
Preheat your oven to 175°C (350°F). Bake for 10–12 minutes.
- The Tell: The edges should be set, but the centers should still look slightly “underdone.” They will firm up as they cool, keeping the center velvety.
Nutritional Information (Per Cookie)
- Calories: 195 kcal.
- Total Fat: 9g.
- Saturated Fat: 6g.
- Total Carbohydrates: 26g.
- Sugars: 18g.
Common Mistakes to Avoid
- Using Too Much Cocoa: If you use more than 3–4 tablespoons of cocoa, the chocolate flavor will overpower the “velvet” tang, and the red color will turn a muddy brown.
- Skipping the Acid: Without the vinegar or lemon juice, the cookie lacks the classic “Red Velvet” flavor profile.
- Using Liquid Coloring: Cheap liquid food coloring is mostly water. It can make your dough runny. Always opt for Gel Paste coloring for the most intense red.
Storing and Reheating
- Storage: These stay exceptionally soft. Store in an airtight container for up to 5 days.
- The “Bakery Look”: Reserve a handful of white chocolate chips and press them into the tops of the cookies immediately after they come out of the oven.
Would you like me to create a “Cream Cheese Frosting Sandwich” guide so you can turn these into Red Velvet Whoopie Pies?